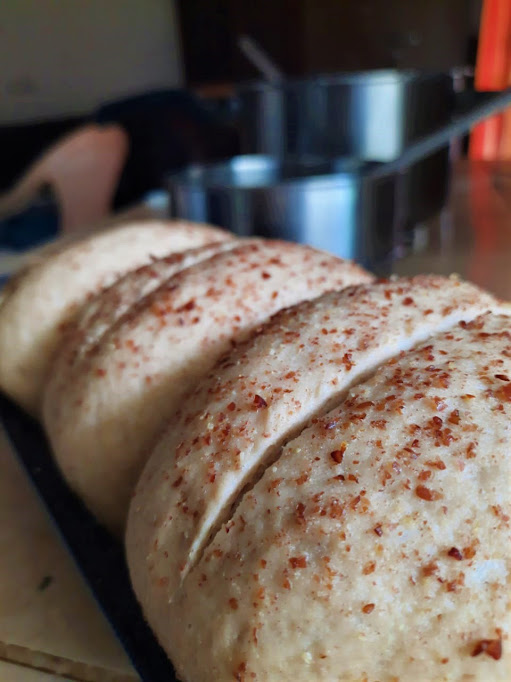
100% Whole Wheat Milk Bread
This is a recipe that has taken me multiple failed attempts over the years! It is still a work in progress, making small adjustments to fine-tune the recipe. This is a process that is very addicting and once you have joined the bandwagon, you just cannot let it go, trying to make more variations along the way.
This bread is made with 100% whole wheat flour, spiked with vital wheat gluten to promote the rise of the dough and prevent it from collapsing during the fermentation process, you can omit this and use only WW flour instead. You will have to rest the dough for an hour at least before kneading otherwise the bread might be a little dense. This is a healthier variant of bread compared to bread made with the usual AP flour/maida since it is not chemically processed to make it more refined. I have found that 100% WW flour gives a more earthy flavor to the bread and leaves you content after eating a slice :)
Here is the detailed recipe for 100% Whole Wheat Milk Bread. I hope you'll enjoy reading it and making it. Please do subscribe to this blog if you enjoyed it and do let me know your thoughts on this recipe. Suggestions are welcome!
Peace.
___________________________________________________________________________________
Ingredients
- 452g of 100% Whole wheat flour - Ashirwad atta
- 48g of vital wheat gluten (can be skipped and replaced with 48g of WW flour)
- 400g warmed milk
- 5g active dry yeast
- 8g sugar
- 10g salt
- 3 tbsp salted butter, optional but I found that it gives a more depth of flavor to the final bread
- 20g flaxseed powder, optional
METHOD:
PART 1: MIXING
* In a large mixing bowl, weigh in the warm milk and sugar and add in the yeast. Mix well to combine the ingredients
* Cover and rest for 15-20 min till the yeast mixture starts bubbling.
* Sift in the flour, gluten, salt and mix till all the dry ingredients are hydrated. Rest the mixture for 15 min to allow all the components to get to know each other a bit
PART 2: KNEADING
* Remove the dough from the bowl onto a lightly floured, flat surface and knead. This is a very important step since it will help to develop the gluten in your bread
* There are three stages to it:
> Push and fold - 2 minutes (Just folding the dough over itself)
> Stretch and fold with the heel of your hand aggressively - 4 min
> Add butter and mix it in the dough (be patient, it will combine well in about 2 min of continuous folding and mixing). Once the butter is combined, knead for another 4-5 minutes or till the dough is soft, smooth, and pliable. If you don't add butter, just knead the dough after the previous step till it is soft, smooth, and pliable
* To check if your dough is ready, just take a small piece out of the dough and stretch it out till you can almost see through it without tearing. This is called the "Windowpane Test". If it does not work, rest the dough for 5 min and knead again for an additional 2-3 min.
PART 3: FERMENTATION
* Now that you have kneaded your dough, you need to shape it into a tight ball and let it ferment and rise. This depends on your ambient temperature. I did mine in a closed room at about 25°C-26°C. If it is warm, the dough will rise faster. Place the dough back into the greased mixing bowl, cover it with a damp cloth and let it rise till doubled in size.
* Mine took about 2 hours to rise. Keep checking on the dough to see if it has doubled otherwise, it will over ferment and not rise properly in the oven.
* Once the dough has risen properly, just give it a whack to degas it completely.
PART 4: SHAPING AND PROVING THE DOUGH
* Remove it from the bowl onto a lightly floured surface and divide it into three equal pieces. Fold each piece into itself till it forms a tight ball
* Place each piece into a well-oiled baking tin, cover it and rest for another hour till the dough rises properly and ferments further, developing more flavor and gluten strength. This is called the "final proof" before baking. Place the dough in the oven directly to proof WITHOUT switching it on.
* Remove the proofed dough, pre-heat your oven to 220°C and then place a tray of boiling water to generate steam inside. This will keep the bread moist and prevent it from drying out, creating a hard crust.
* Lightly brush your dough with milk and sprinkle your flaxseeds on top of the dough. Place it in the oven and bake it for about 20-25 min till a brown-colored crust ("Maillard Reaction") is formed.
* Remove the bread from the oven and place the bread on a wire rack and let it rest for 30 min before cutting it
* Cut it into pieces and enjoy with tea or as French Toast or just a plain sandwich with ham, vegetables, and cheese.


Comments
Post a Comment